Project Setup
New Project
-
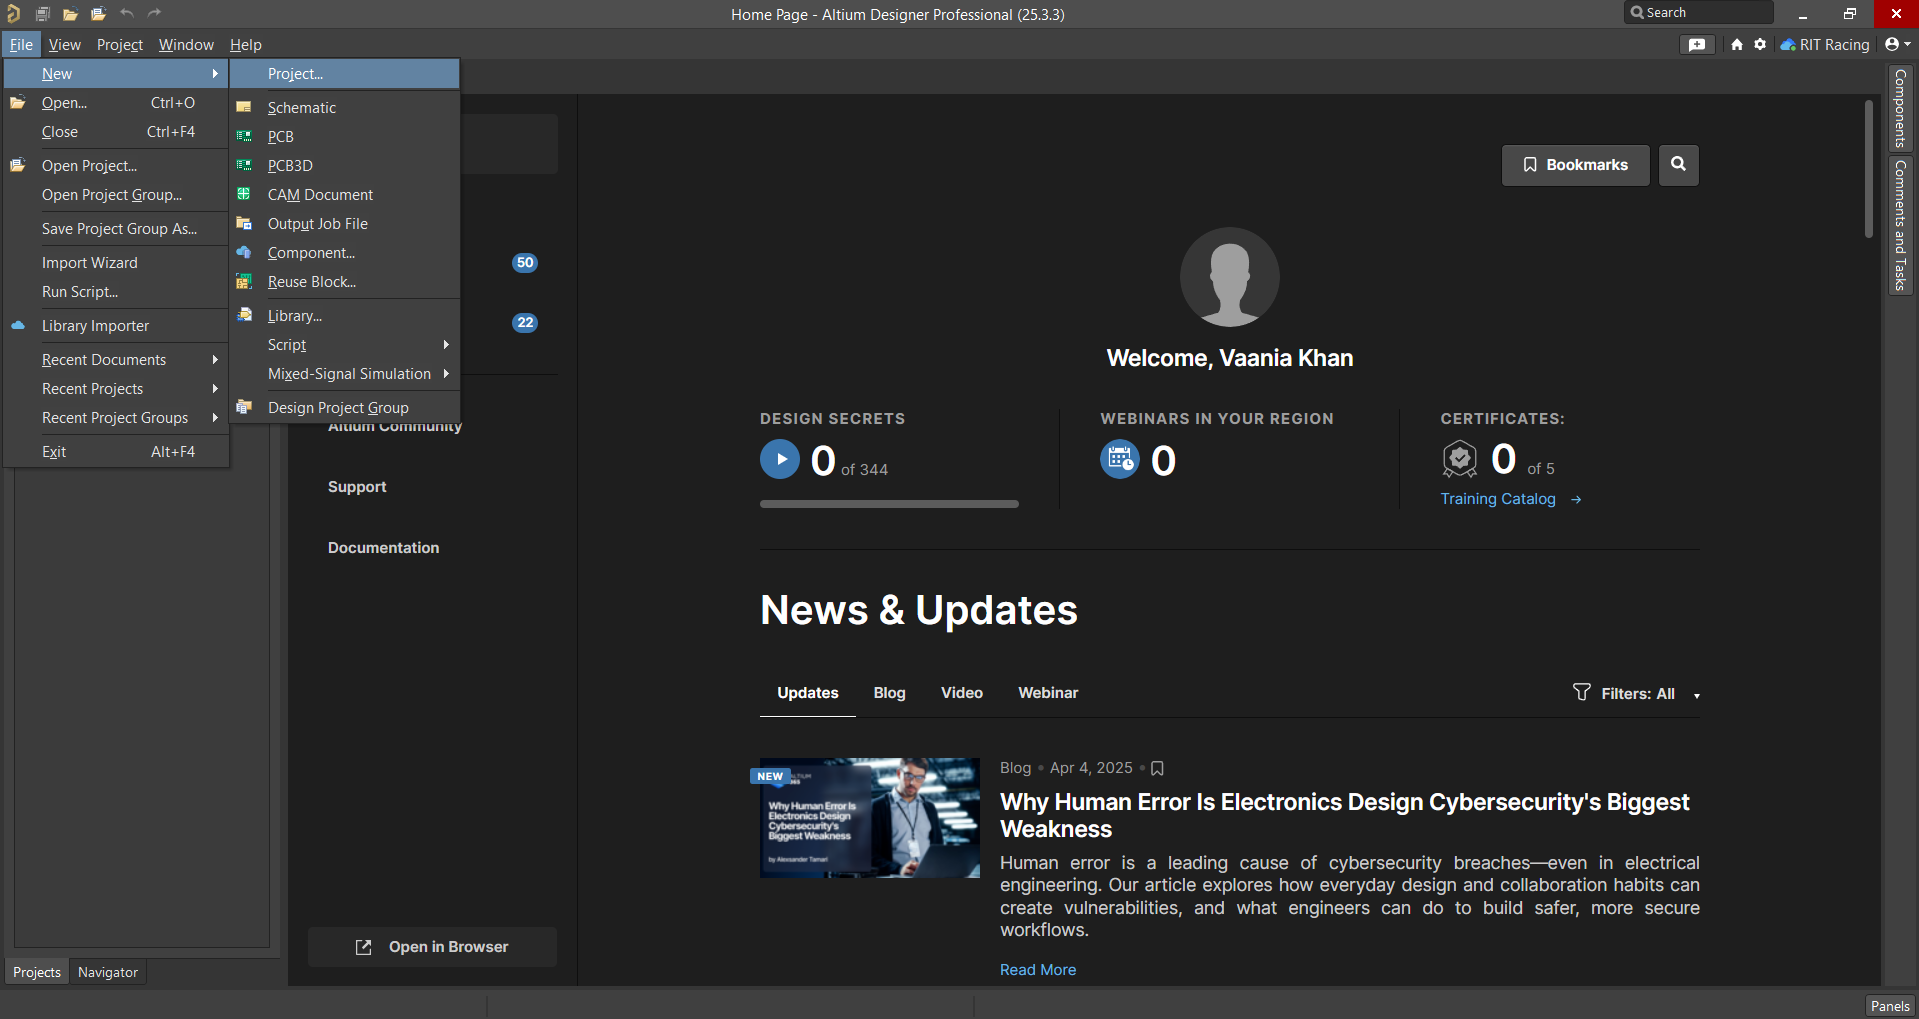
In the toolbar at the top, navigate to File → New → Project.
-
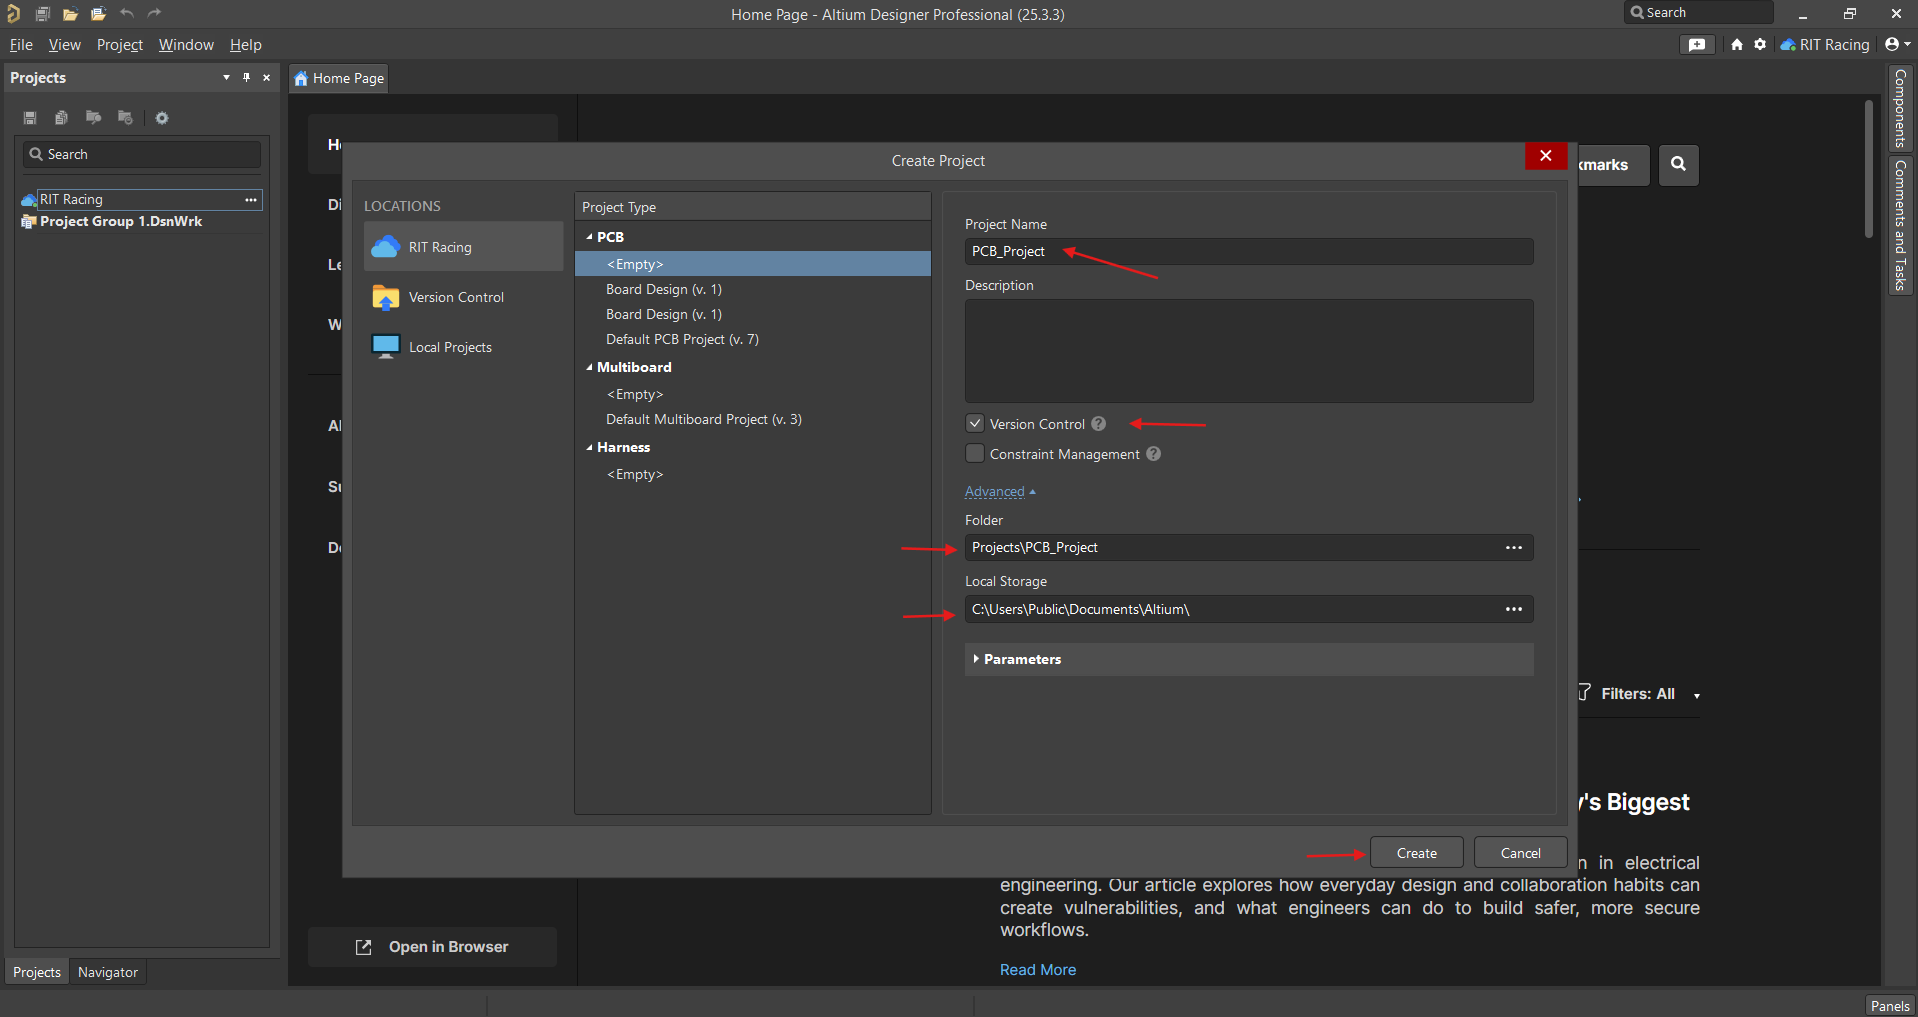
A window will open where you can set the project's name, its local path, and its location on the RIT Racing server. After confirming, click Save.
Add Schematic
-
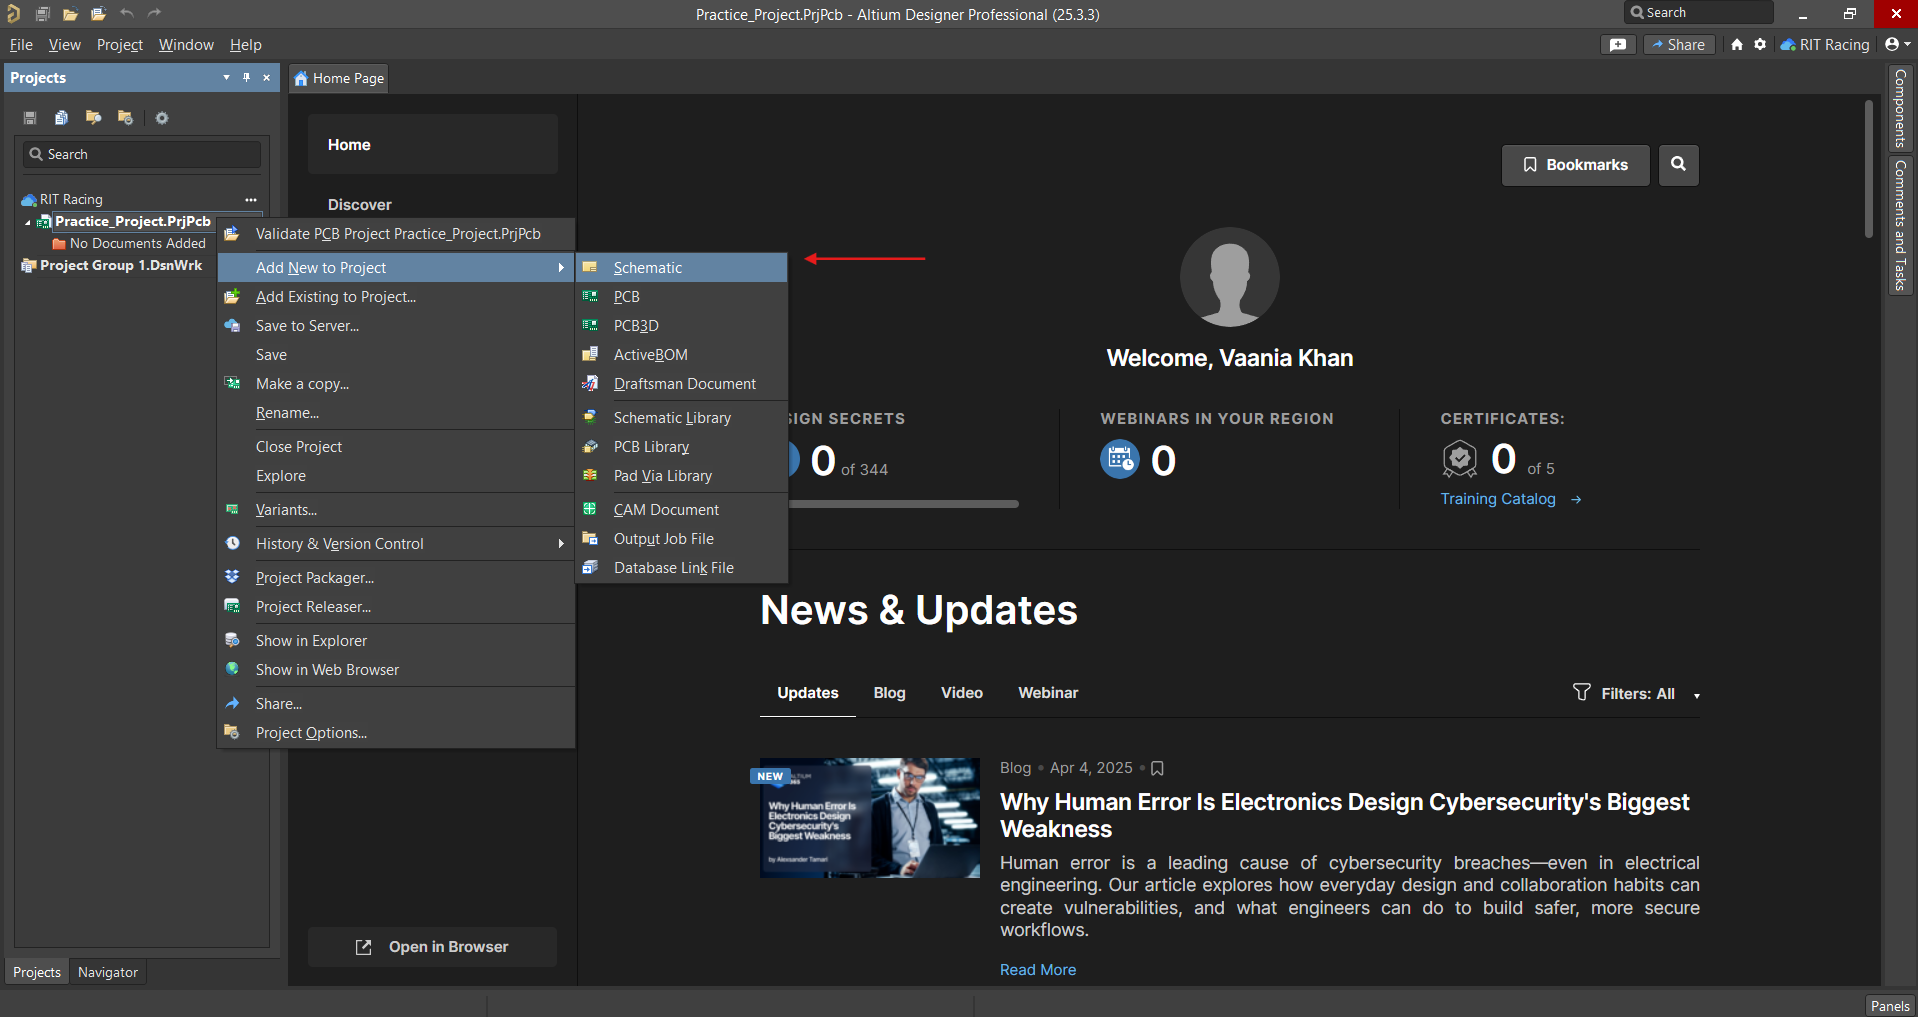
Once the project loads, add a schematic: right-click on the project name and select Add New to Project → Schematic.
-
A blank schematic will appear.
-
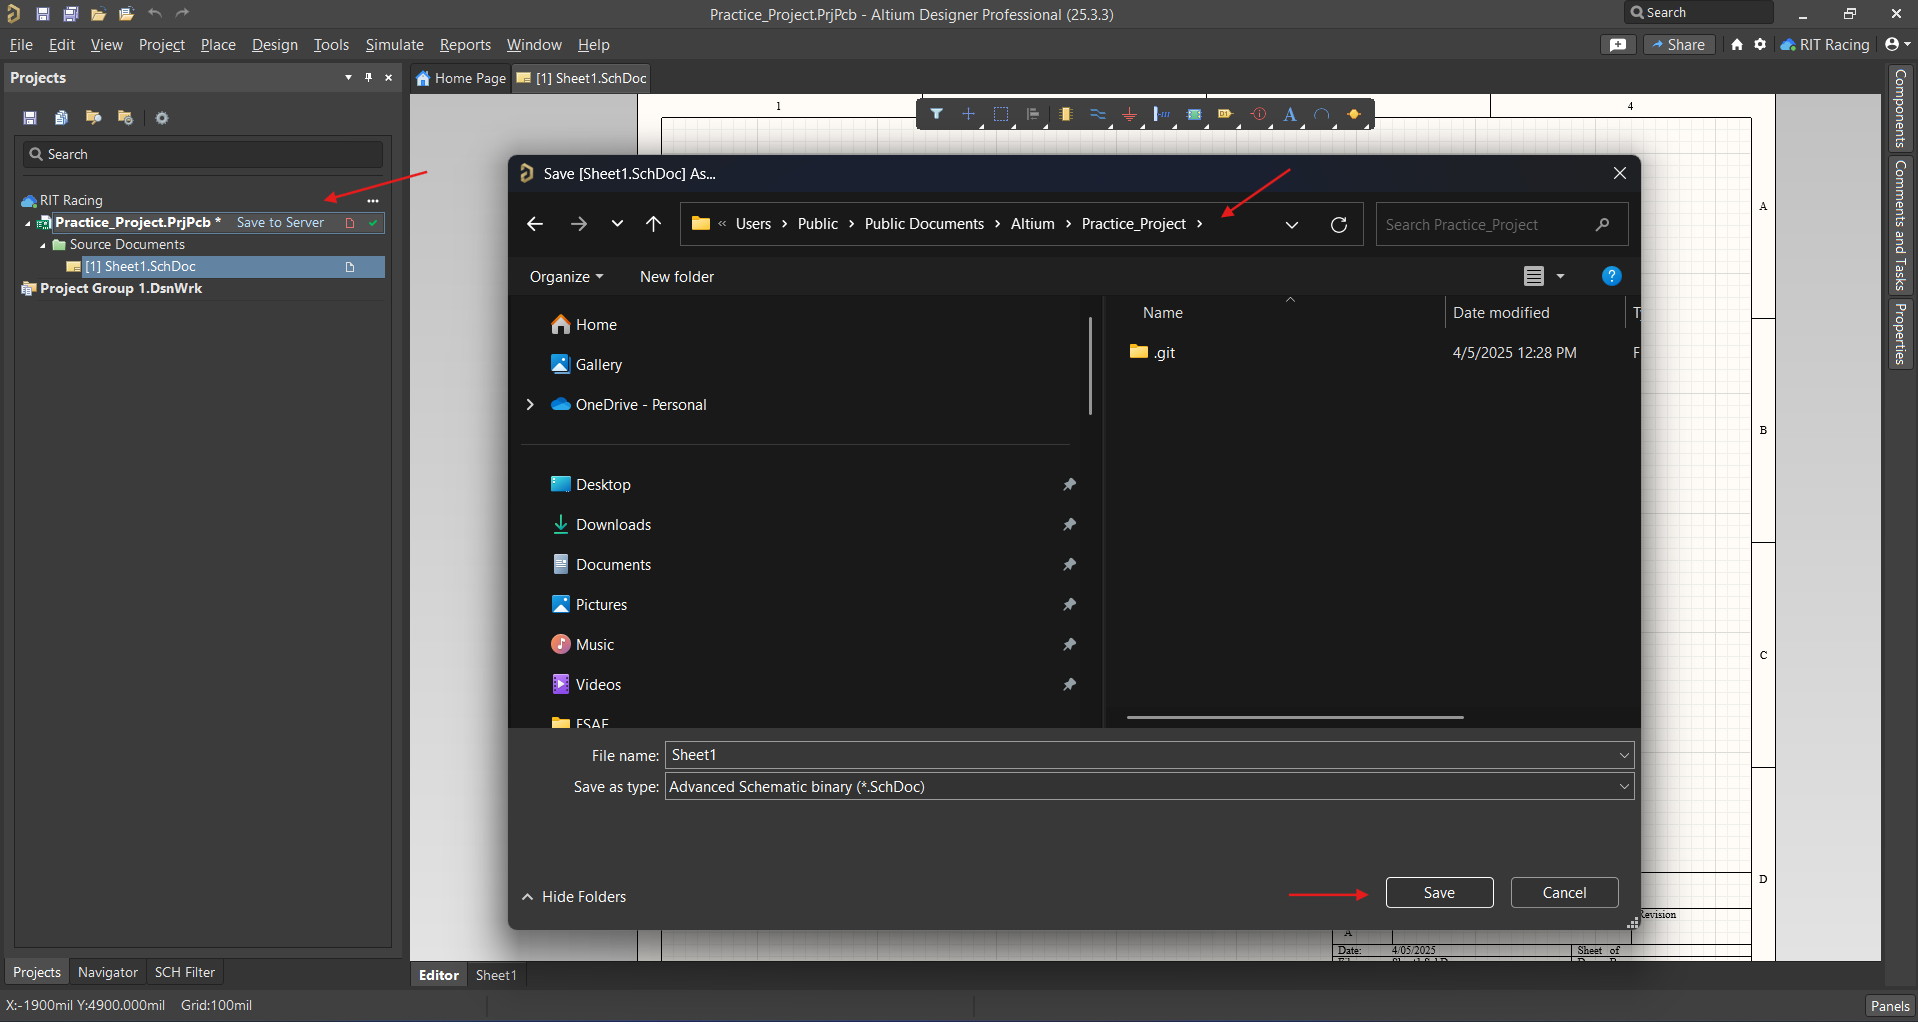
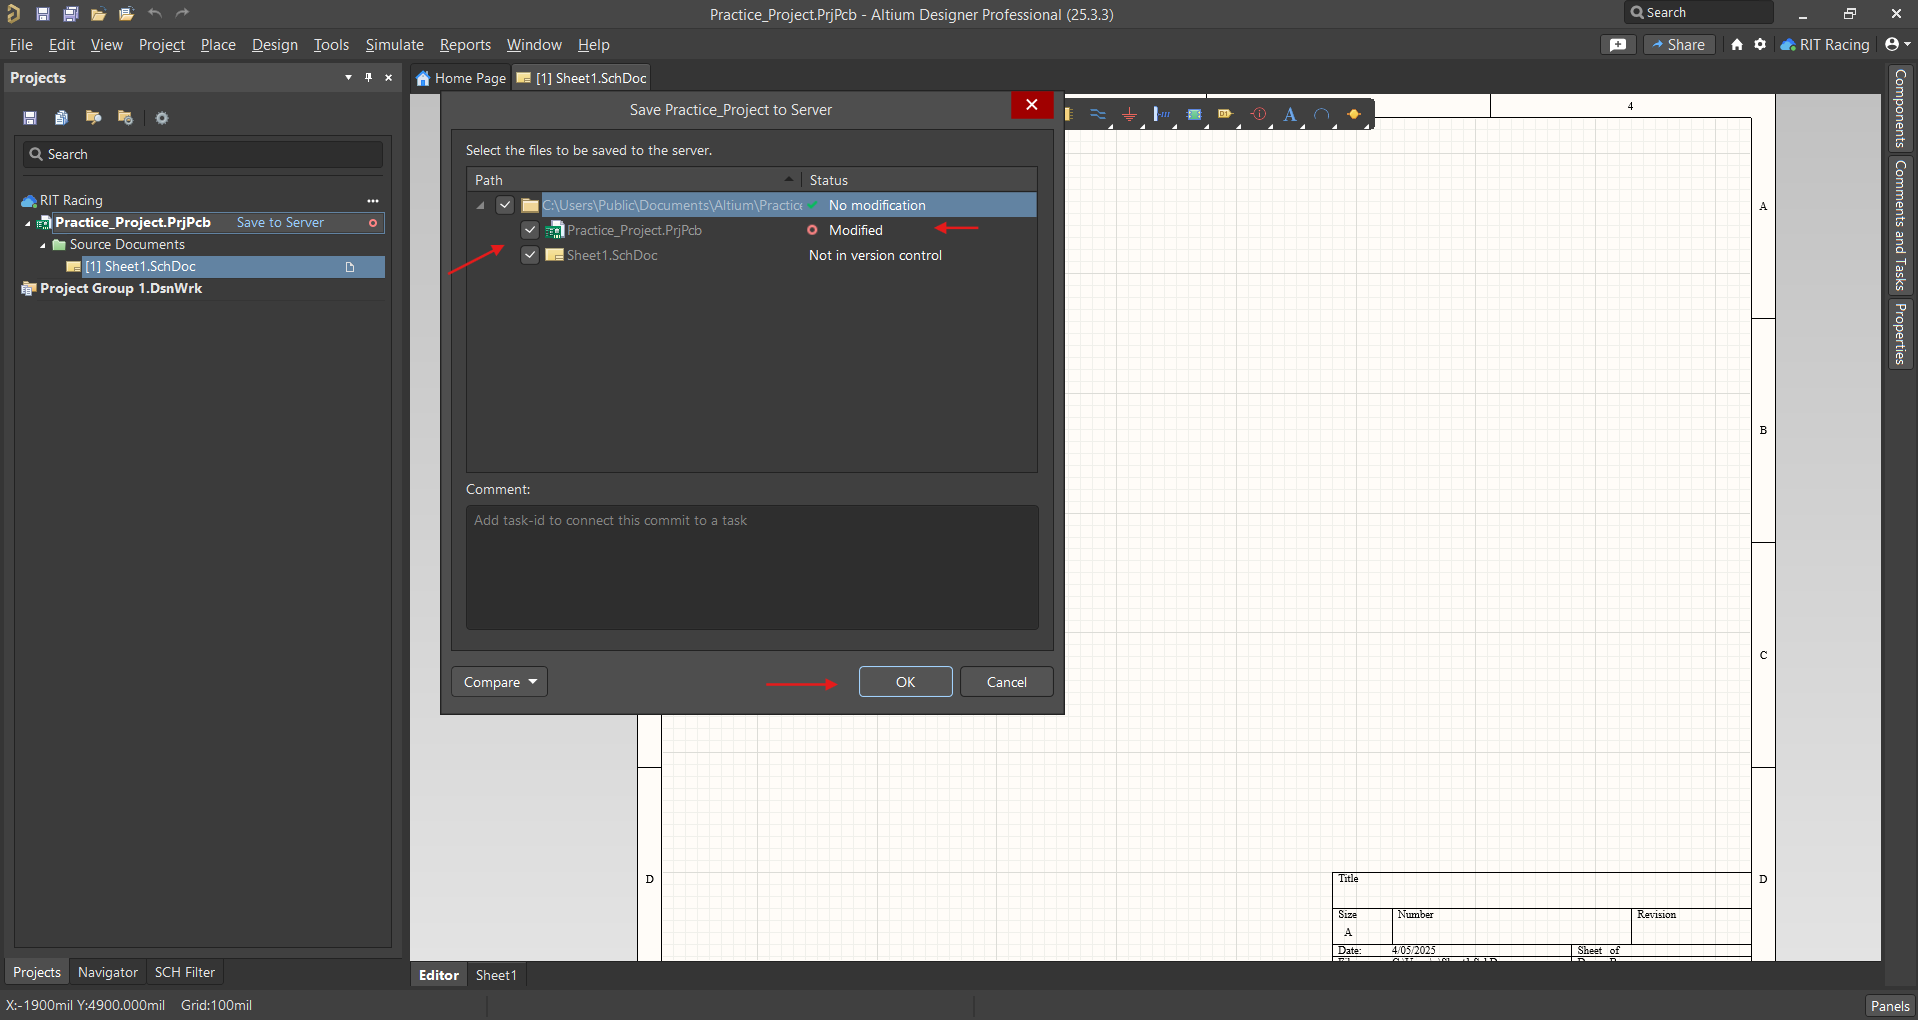
You'll notice an asterisk (*) and a red symbol next to the project name. This indicates that changes have been made but not yet saved to the server. To push the changes, click Save to Server.
-
The first time you save, you'll be asked to choose a local location. You can usually accept the default path, which will typically look llike this:
-
After saving locally, a window will display the modified files. You can choose which updates to push to the server (all are selected by default). Uncheck any files you don’t want to include, then click OK.
-
The title block on the schematic displays key information like board name, author, revision number, and date. This information can be edited in Properties → Title Block
Add PCB Document
-
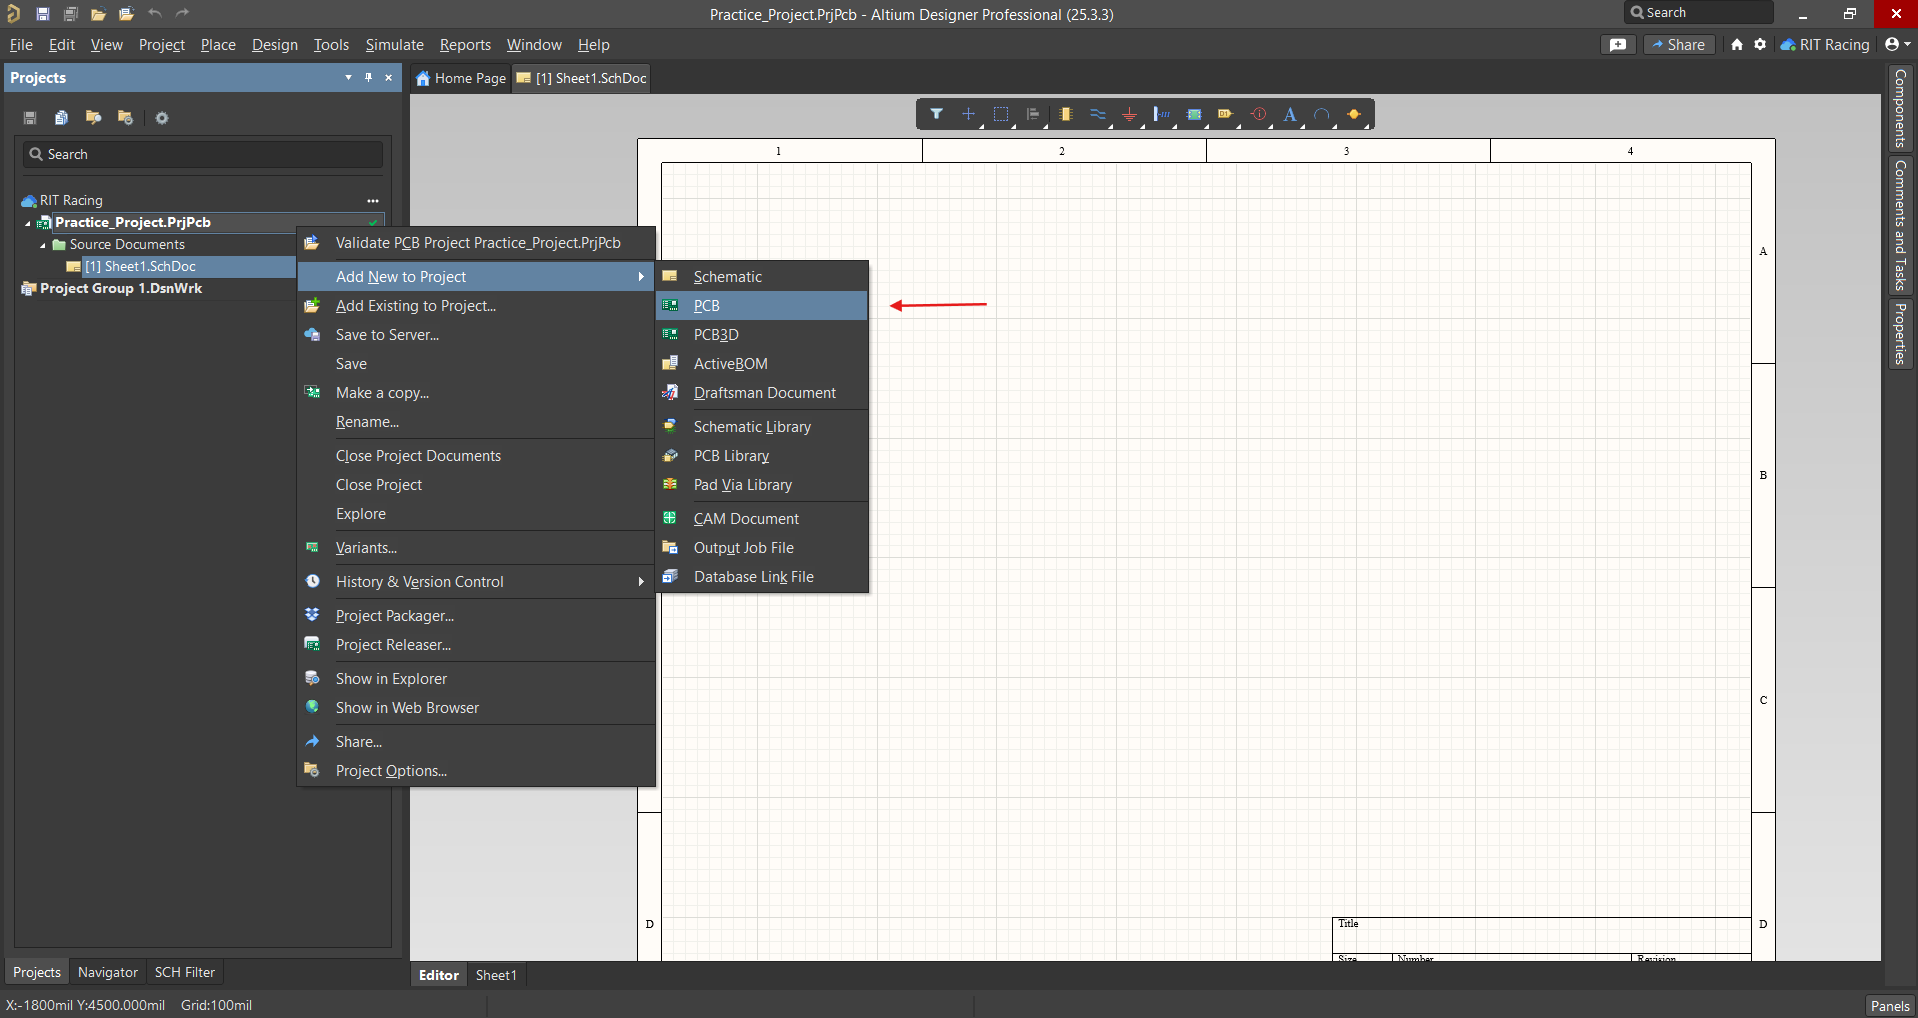
To add a PCB design to the project, right-click on the project and go to Add New to Project → PCB.
-
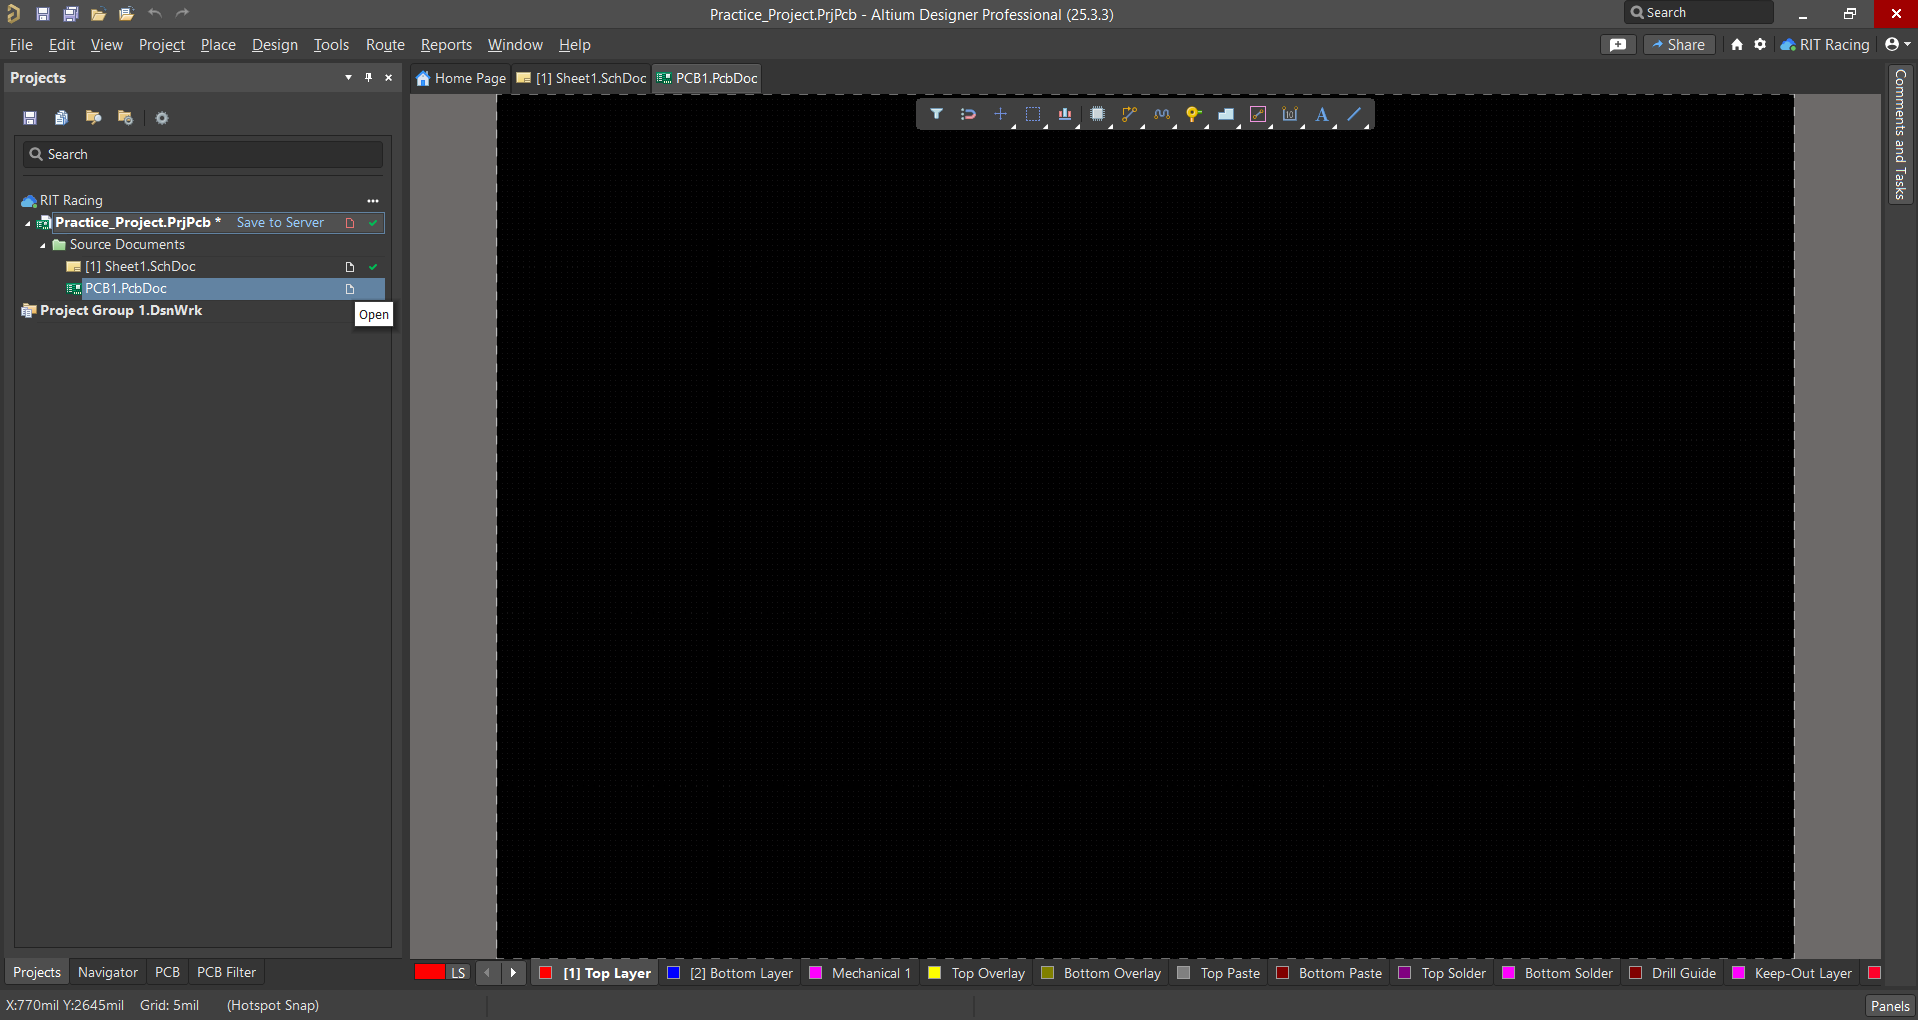
A blank PCB document will appear. The bar at the bottom shows the different available layers. Once your schematic is complete, you can update this design with components.
Design Rules
To maintain consistency and ensure that designs conform to technical requirements, a standardized set of PCB design rules has to be imported to Altium for use in the team's projects. This is a .RUL file that will be provided to you.
To import:
- Go to Design → Rules in the top menu.
- In the PCB Rules and Constraints Editor, right-click on the Design Rules folder on the top left and select Import Rules.
- The Choose Design Rule Type panel will open. Select all (Ctrl+A) and click OK.
- Browse to the .RUL file and select it.
- Click Open.